Microsoft Provider 
Microsoft fully supports the OAuth 2.0 protocol and can therefore be used as a trusted provider for authenticating users and providing their claims.
Setup
A few steps are needed to get Microsoft working as a provider. You'll need to register the Ometa Framework as an application in the Azure portal of Microsoft.
Warning
In the following steps, you will be adding the Ometa Framework as an application to Azure. Don't do this under your personal account, but use an account of your organisation in Azure.
Register the Ometa Framework as an Application
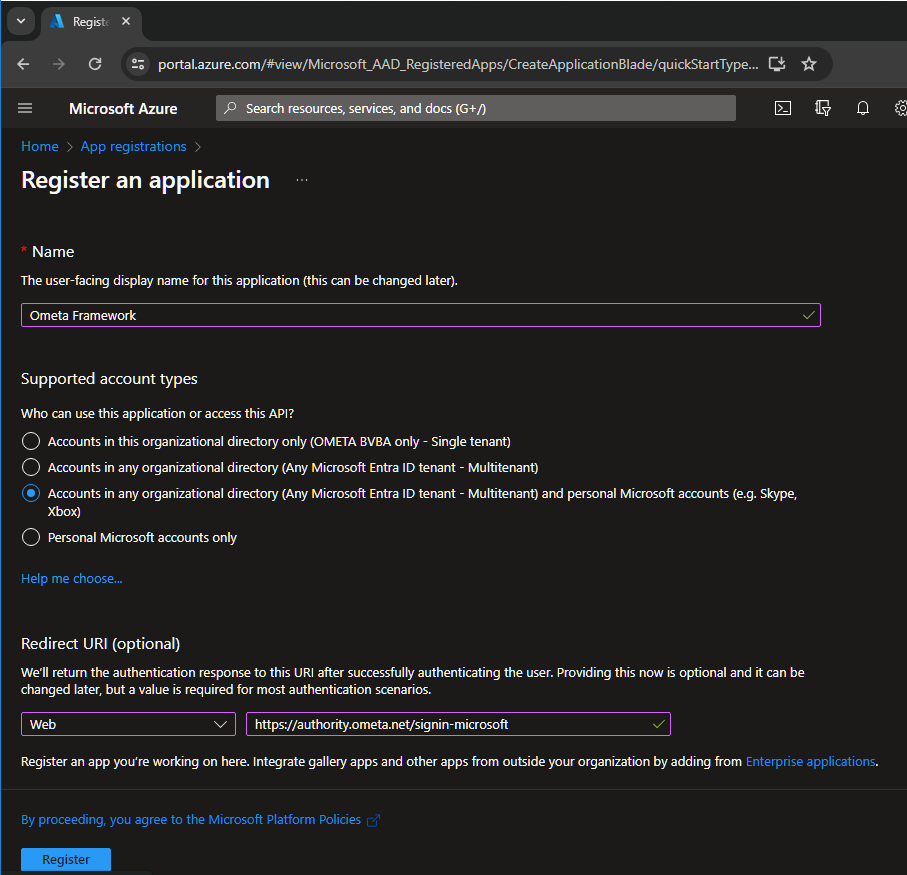
- Login to the Microsoft Azure Portal, navigate to the App Registrations and click on New registration.
- Fill-in the display name which you want to use for the Ometa Framework.
- Choose which account types will be logging in via this application.
- Choose Web as platform and fill in the redirect URI. This must be the url of the Ometa Authority Service appended with /signin-microsoft for example: https://ometa-authority.example.com/signin-microsoft.
- Click on Register.
Create a Secret or use a Certificate
The application has now been registered. The Authority Service needs a secret to prove to Azure that it is this service that's requesting a token for the authenticating user. This is an extra security check together with a valid redirect uri. You can use a certificate, or use a secret.
- Click on the Certificates & secrets in the navigation tree on the left of the application registration.
Secret
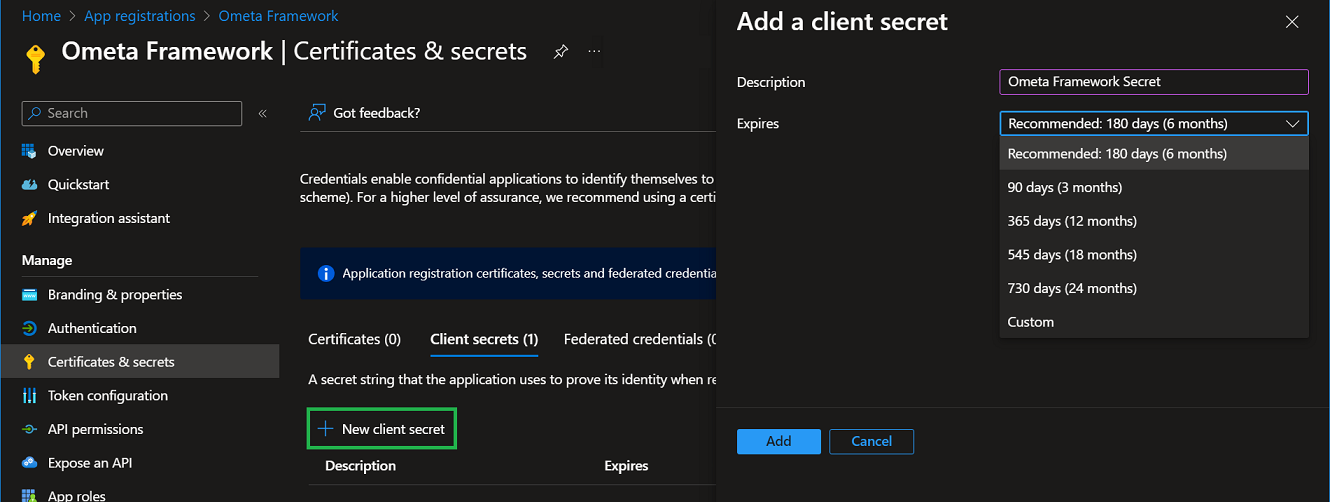
- Click on the New client secret button.
- Fill-in a description and choose when the secret will expire. Remember to generate a new secret and update the secret on all places where used in the Ometa Framework.
- Click on Add.
- Create a task in your Outlook Agenda to generate a new secret a week before the expiration date!
Caution
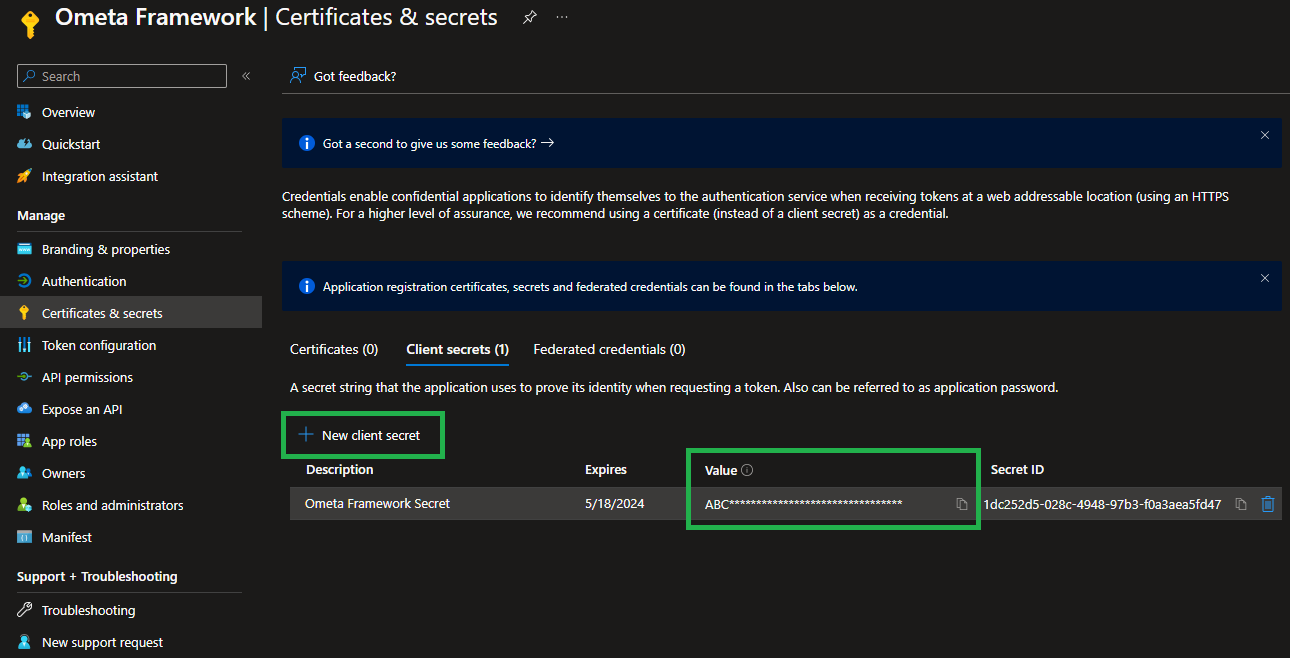
Your secret has now been generated. Don't forget to copy the value of the secret because you won't be able to retrieve it after you leave the page or do a refresh!
You'll need the secret later (together with the application ID which you can find on the overview of the app) when configuring the providers in the Ometa Framework itself.
Threat this secret as a password and store it only in a password manager.
Certificate
It is also possible to add a certificate to the application instead of a secret. There are two options here:
- You install the certificate on the machine where the Ometa framework is running.
- You store the certificate in the Azure Key Vault.
1 - Local Machine
Make sure the certificate is installed on the local machine. Click on the 'Upload certificate' button and select the certificate.

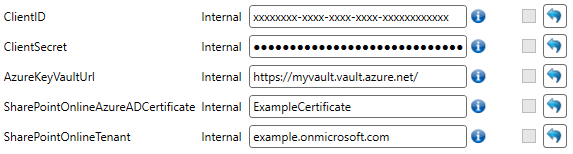
The last thing we need to do is to fill in the required fields in the Building Block profile, and in the 'appsettings.json' file of the generic REST service. The following fields are required:
- Client ID
- SharePointOnlineAzureADCertificate
- SharePointOnlineTenant
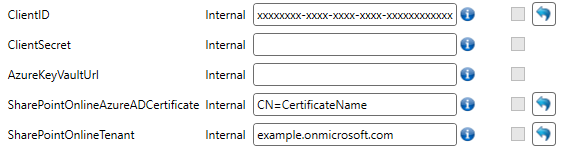
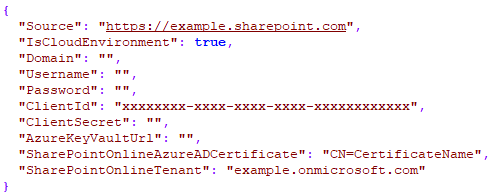
In the 'appsettings.json' file of the generic REST service, it will look as follows:
You're now able to execute BB's and loading ADM's on SharePoint, if the app has the permission to access SharePoint.
2 - Azure Key Vault
It's also possible to store the certificate in the Azure Key Vault. Import your certificate:
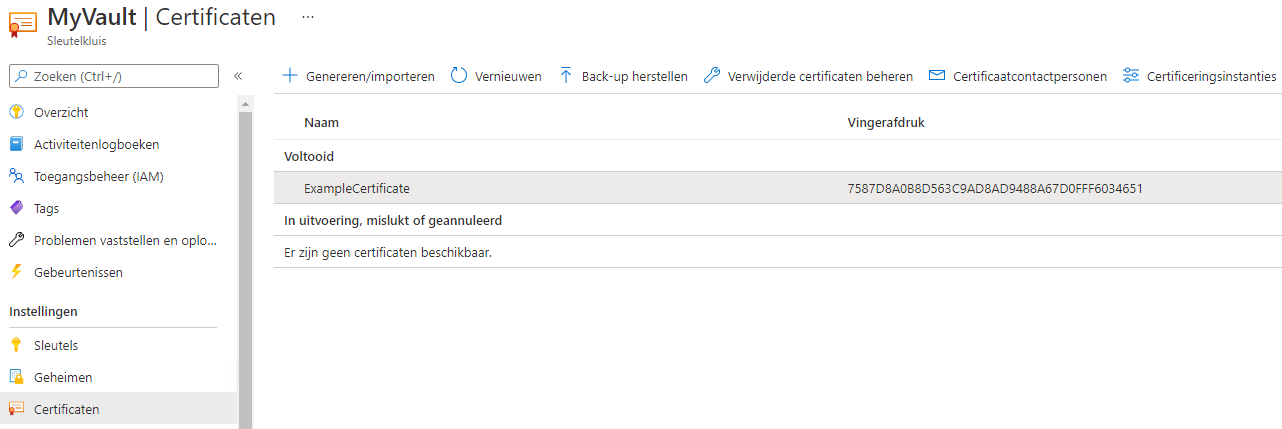
You should also upload the certificate to the app.
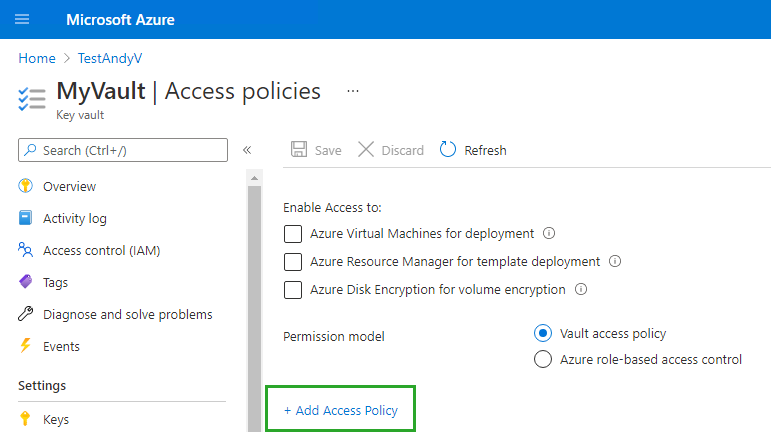
Next, you should give your app access rights on your vault. Navigate to the 'Access Policy' page and add a policy:
Select your app as a principal and configure the other options like this:
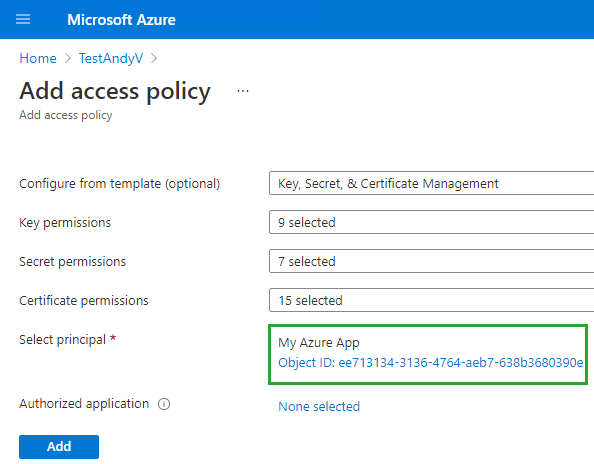
Your app is now able to access the key vault.
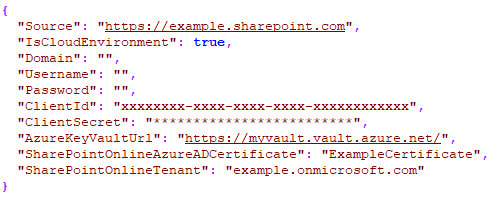
The last thing we need to do is to fill in the required fields in the Building Block profile, and in the 'appsettings.json' file of the generic REST service. The following fields are required:
- Client ID
- Client Secret
- Azure Key Vault Url (https://<VAULT_NAME>.vault.azure.net)
- SharePointOnlineAzureADCertificate
- SharePointOnlineTenant
In the 'appsettings.json' file of the generic REST service, it will look as follows:
You're now able to execute BB's and loading ADM's on SharePoint, if the app has the permission to access SharePoint.
API Permissions
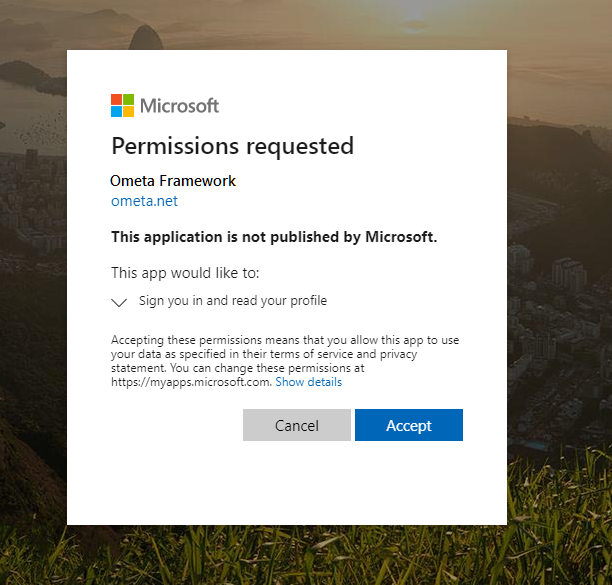
By default, only the API permission User.Read is added and is user-consent based. This means that a user, who tries to login, will have to give consent to the Ometa Framework for reading its profile information like their name and e-mail. This consent must be given the very first time a user tries to login with Microsoft via our framework.
Permission Directory.Read.All
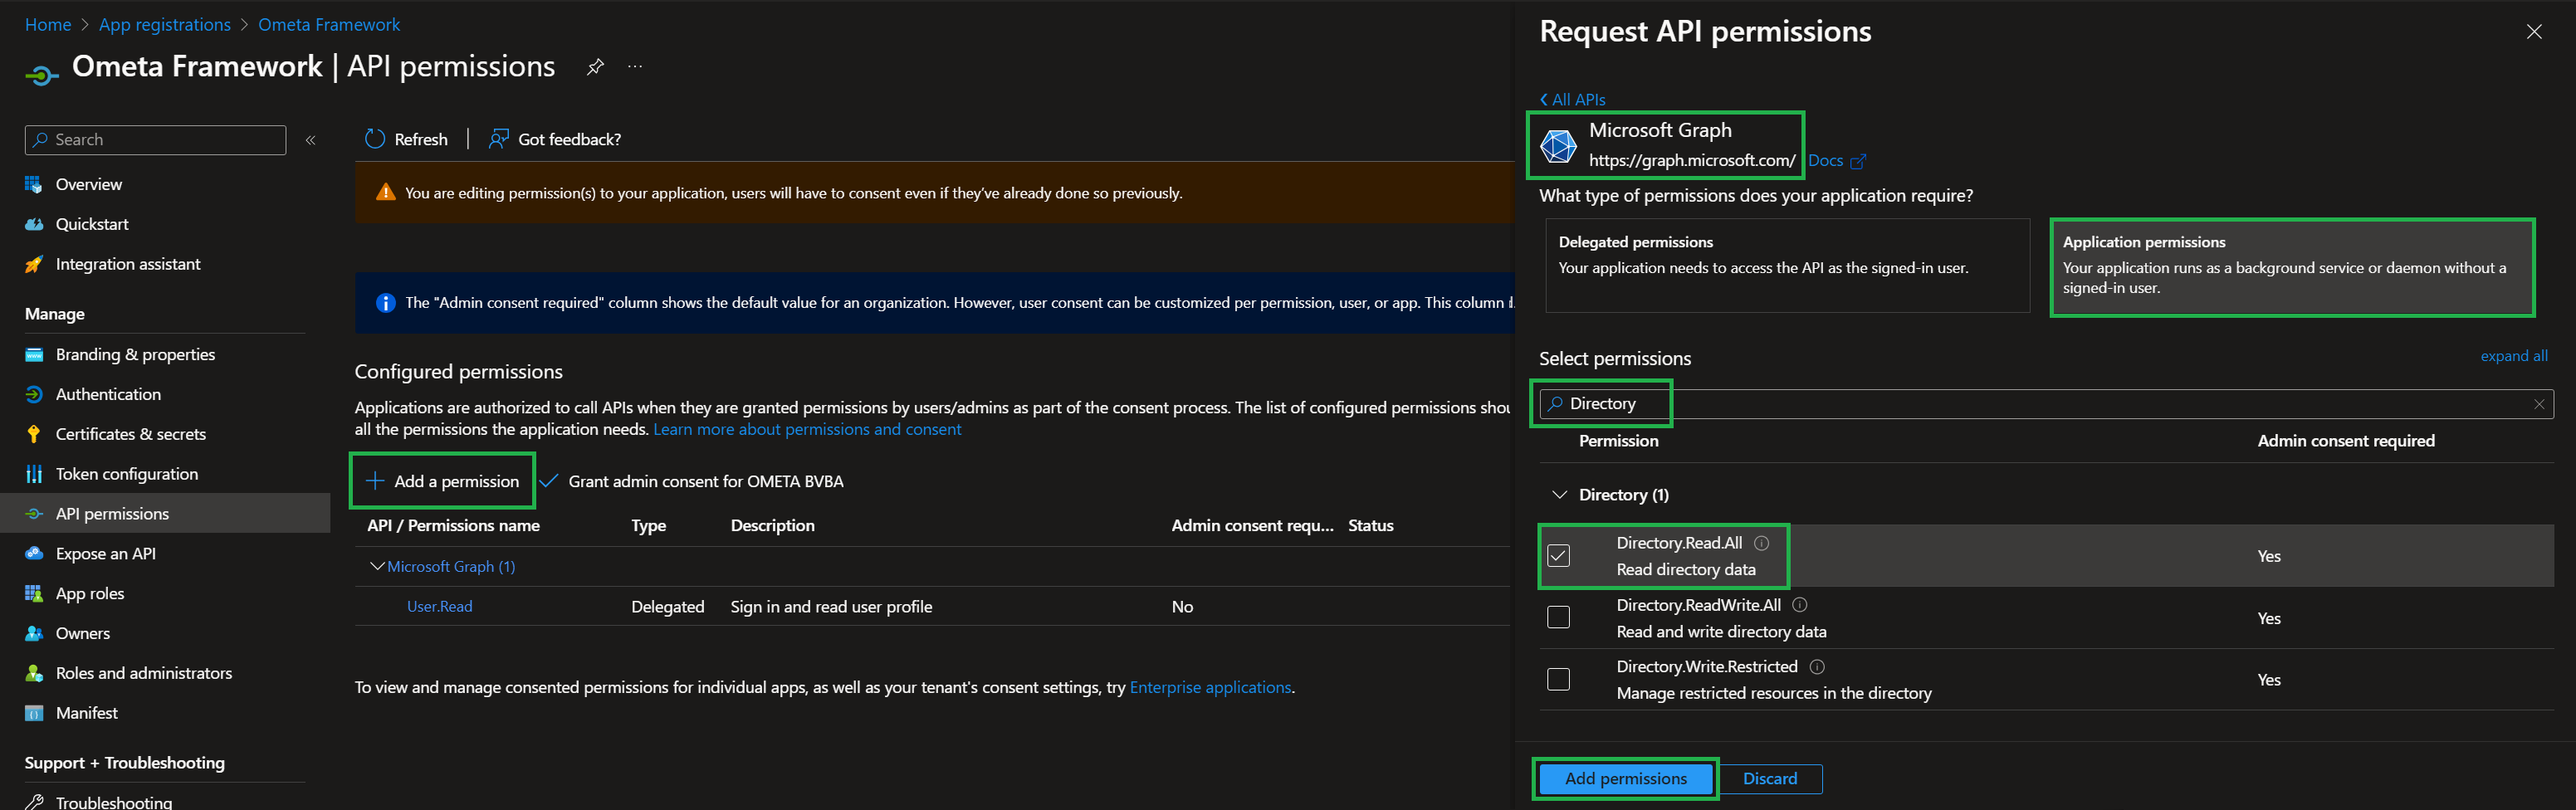
To be able to read the AD group memberships of your users in Azure AD, you'll need to set an extra permission named Directory.Read.All on the application registration. This enables our framework to read and refresh active directory information and group memberships.
- Click on the API permissions in the navigation tree on the left of the application registration
- Click on Add a permission
- Click on the tile Microsoft Graph
- Choose Application permissions as permission type
- Choose Directory.Read.All and click Add permissions
Warning
This permission requires admin consent. This can be configured following the steps below. Failure do to so will disable the functionality regarding security with AD group memberships.
Admin Consent
Microsoft has made it possible to bypass the user consent screen for any permissions configured on an application registration. This comes in handy if you don't want to bother your users with the consent screen the first time they login to the Ometa Framework with their Microsoft account. An admin consent for Directory.Read.All is always required if you want to fetch the ad group memberships of signed-in users.
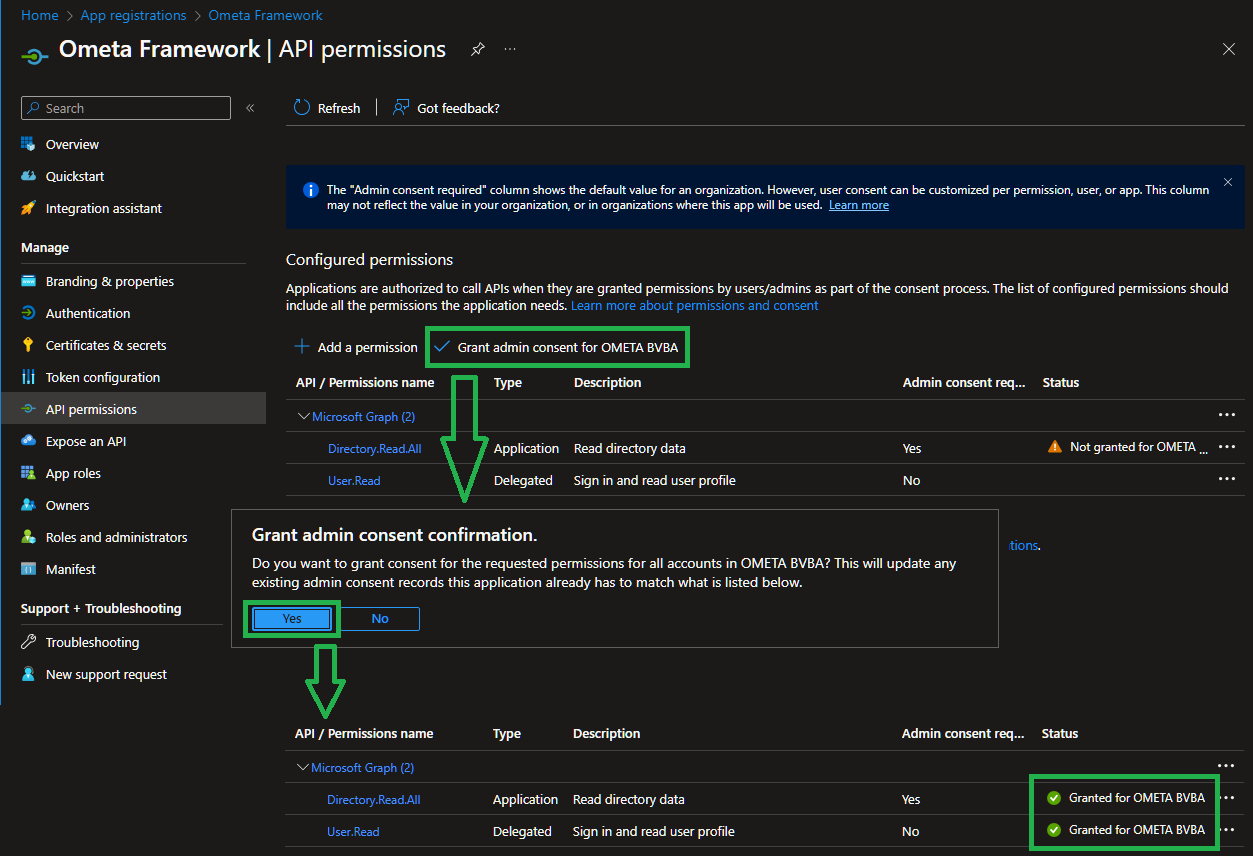
- Click on the API permissions in the navigation tree on the left of the application registration
- Click on Grant admin consent for *your organization* and confirm your choice
You'll see that the User.Read and the Directory.Read.All permissions are now consented by an admin.
Note
Bypassing the consent screen is only possible for users within your organization. Users from other organizations or with a personal microsoft account will still have to give consent the very first time they try to logon.
Claims
The following claims are provided by Microsoft when a user successfully authenticates itself.
- objectidentifier
- nameidentifier
- tenantid
- name
- givenname
- surname
- emailaddress
- adgroup (zero, one or multiple times depending on the memberships of the user)
An example:
| Type | Value |
|---|---|
| objectidentifier | 7dd7d026-146d-42e0-8f24-49cedcdf1b38 |
| nameidentifier | 58ce8d03-5a68-4695-904a-2f6975Ba7164 |
| tenantid | ffe74249-a2ee-4a6d-943f-353aa2bdf90c |
| name | John Doe |
| givenname | John |
| surname | Doe |
| emailaddress | john.doe@ometa.net |
| adgroup | Developers |
| adgroup | External |
| adgroup | General |
Important
- The objectidentifier claim contains a unique id identifying your user tenant and application wide. This id will never change on the microsoft identity platform.
- The nameidentifier claim uniquely identifies your user within the application registration. Do not use this id to match a user with other application registrations.
User Consent
Note
This information only applies if you didn't consent as an administrator for all users within your organization or the user, who tries to login, is not part of your organization.
The first time a user will use the Microsoft login to authenticate themself for using the Ometa Framework, they will need to give consent to the Ometa Framework for receiving information like their e-mail address and name.
Note
If the user doesn't give consent, he/she will not be able to use the Ometa Framework.
The consent must be given only once.
Throubleshooting
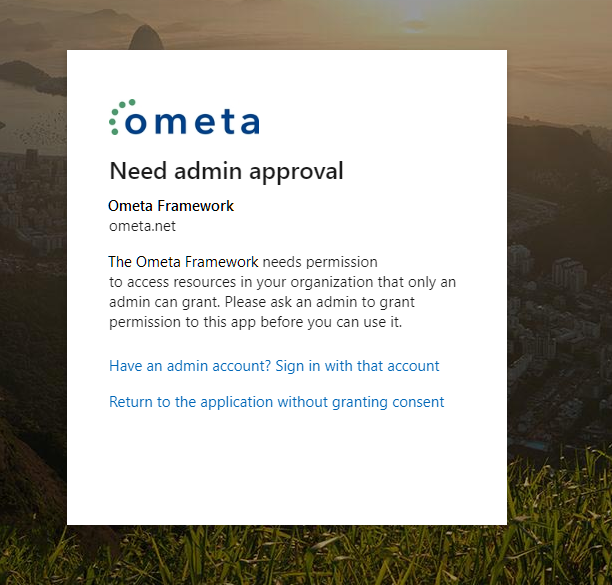
Need Admin Approval
If you get the Need admin approval popup, your IT administrator can either:
Allow users to consent applications themselves in the Azure user settings.
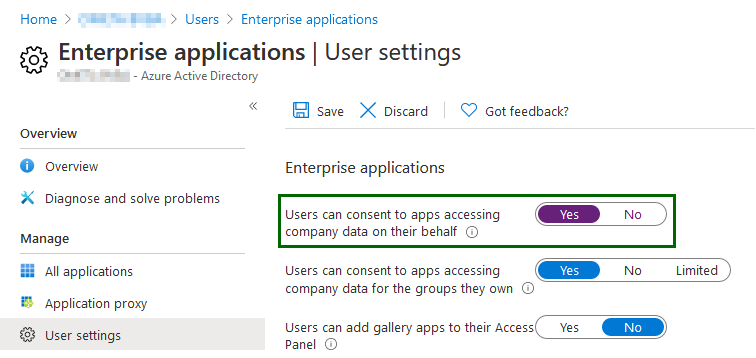
Grant admin consent themselves to the Ometa Framework application.
This also applies when inviting external users.
The IT administrator can revoke the access at any time by going to the app registration in Azure.