3. Setting up the Task Views
The last step is to setup the task views so users can view their document approval tasks and administrators can manage the solution. The following are offered as standard views in the object DocumentApproval.Task. Use the For Case views when using it on a specific case site when you want to filter the tasks for this case.
User Specific Views
- Get Active Document Approval Tasks Assigned To User (For Case) - Personal View: personal view of active document approval tasks related to you. It is a multi view with two views linked: approvals assigned to me and approvals started by me.


- Get Active Document Approval Tasks Assigned To User (For Case): multi view with 3 views: open approvals assigned to me, owned by me (you're an approver for the document, but not the current approver) and all open approvals. This view can be used when it doesn't matter if users can see all the approvals (for a specific case).
Management Views
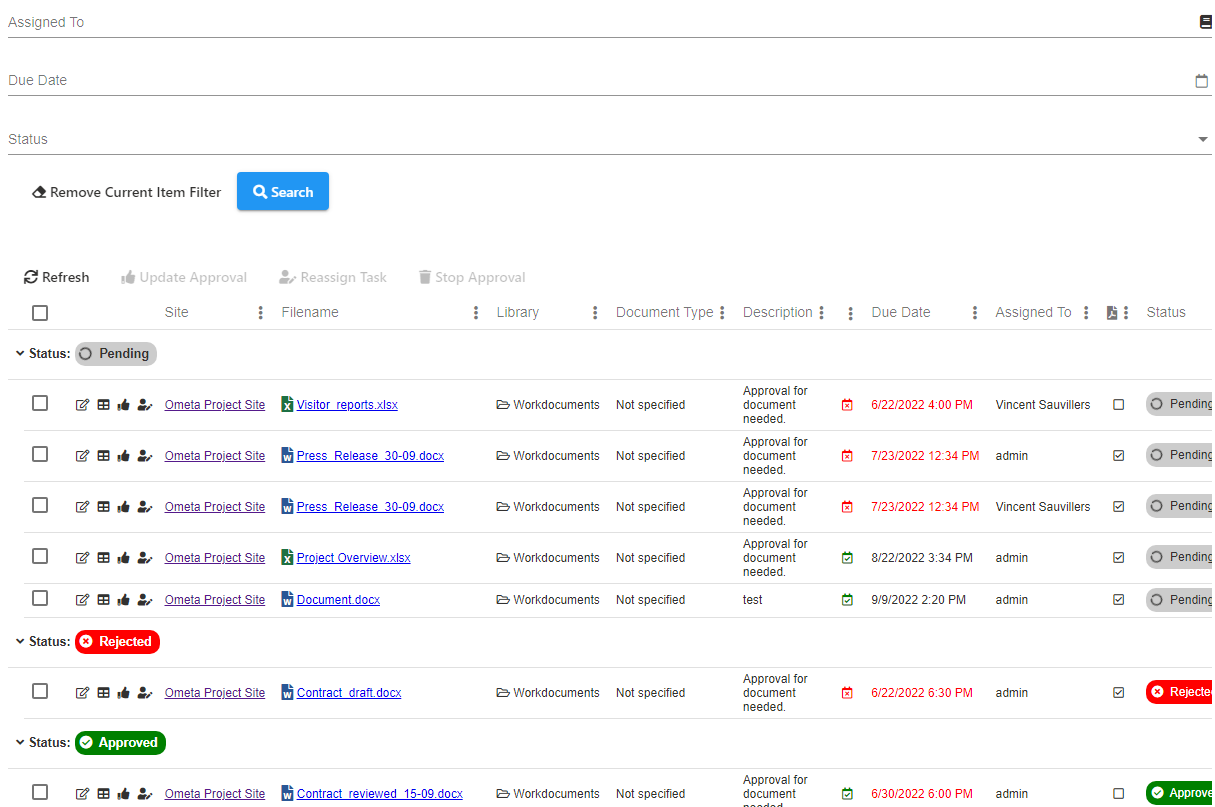
- Get All Document Approval Tasks: management view for all document approval tasks, this is best placed on a management page for administrators only. This view contains an overview of all tasks grouped by status, users can update the due date here and stop approvals that were started by accident for example.
- Task Filter: optional context manager to filter all the task views. This context manager has the assigned to, due date and status as filter.
Tip
If you are working on a framework server with multiple solutions using the document approval you can filter the task view by solution / lifecycle by setting the OmetaFieldLibrary parameter in the URL. The name or ID of the lifecycle can be given, multiple names can be separated by a semicolon.
You can also set the the lifecycle / case property Lifecycle or Sublifecycle on this case displaying those task views to filter the views.