Setting up a connection
This article will provide you information for setting up a connection to a SQL database. It explains the actions that are possible for creating a template and a profile based on that template.
The first step in configuring a connection is determining the template you want to use. This can be done in the templates screen.
The templates screen
The templates screen can be reached by following the next steps:
- Open the application menu
- Hover over “Master Data”
- Click on “Templates”
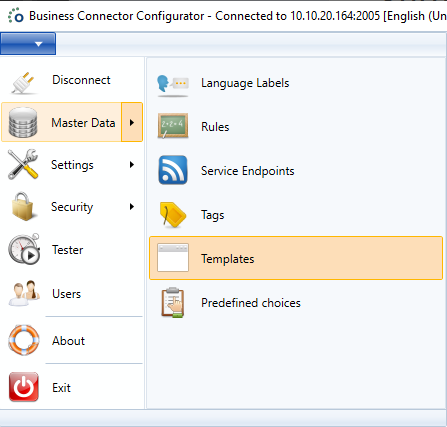
The templates screen will open:

The templates screen is comprised of three parts:
- A ribbon with actions at the top,
- A list of templates on the left,
- The fields in the template on the right
The above screenshot shows an example of a MAPICS template. This is a predefined template that is added when the software is installed. It holds the parameters to connect to a MAPICS interface. These parameters (fields) are used by the associated MAPICS interface.
Tip
The software comes with a lot of predefined templates that might suit your needs. If no template suits your needs, you can always create your own templates.
The following ribbon actions are possible:

| Number | Description |
|---|---|
| 1 | Create a new template based on a specific given interface. |
| 2 | Save all the changes to the current template. |
| 3 | Discard the changes to the current template. |
| 4 | Remove the currently selected template. |
| 5 | Make an identical copy of the currently selected template. |
| 6 | Create a new field in the currently selected template. |
| 7 | Update the field definitions in the profiles based on this template. |
| 8 | Save the changes to all of the templates. |
| 9 | Discard the changes to all of the templates. |
| 10 | Refresh the templates screen. |
| 11 | Close the templates screen. |
Creating a template

Usually you want to create a new template if an existing one doesn’t have the necessary fields or when you have written your own interface. A template can be created in two possible ways:
| Number | Description |
|---|---|
| 1 | A new template using the Create button. |
| 2 | A copy of an existing template using the Copy button. |
Adding fields to a template

If a template doesn’t contain the needed fields, new fields can be added. This can be done by clicking the Create Field button (2). When this button is clicked, a small dialog appears, requesting for the name of the field you want to create.
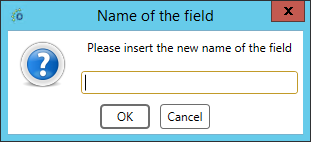

In the example above we created a new field called Query Timeout. This field can be configured by some properties:
| Property | |
|---|---|
| Type | Specifies the type of field. See below for the description on the different type options. |
| Value | Specify a default value for that template. Any newly created profiles will have this value as the default value for the field. |
| Mask | Specify if the value for the field should be masked. This is for presentation purposes only. Anyone who deactivates this option will be able to read the value again. |
| Required | Specify if the field must be filled out. If the field is required but no value is provided in the profile, it is impossible to save the profile. |
| Description | Specify a tooltip for the person that is filling out the profile. |
These are the options for the type property:
| Type | Description |
|---|---|
| Internal | The field is used internally by the interface and will not be used by the external software. |
| External | The field will not be used by the interface itself, but will be passed to the external software (must be supported by the interface and the external software). |
| Argument | This field will be passed as an argument in the startup line of the interface. |
| Environment | Before the interface is started, the Ometa Business Connector Slave Listener will set this field as a system environment variable on the server where the interface will be started. Any value given will also be set. |
| Dynamic | When interface connections are reused, all fields will be checked to see if an open connection is the same as the requested connection at that moment. Dynamic fields will be ignored in these checks. |
It is important to note that any newly created fields will not be available on existing profiles. To push the new fields to existing profiles, you can simply click the Update Profiles (3) button.
Note
Added fields can always be removed using the red cross at the end of the row, fields on system templates however can not be removed.
The profiles screen
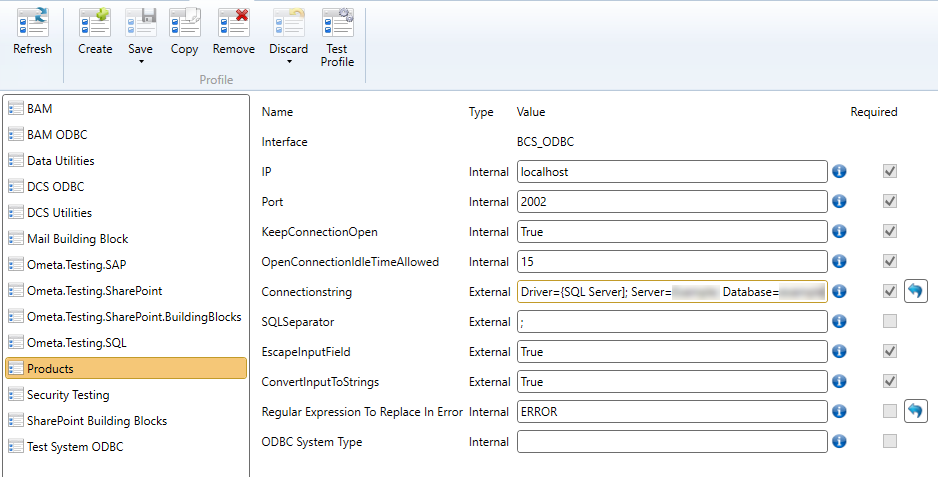
The profiles screen is comprised of three parts:
- A ribbon with actions at the top,
- A list of profiles on the left,
- The configured values in the selected profiles on the right
The above screenshot shows an example of a profile that is created based on the ODBC template. As you will notice, the profile has the same fields as the template but now we have filled them out to configure a connection to this database.
The following ribbon actions are possible:

| Number | Description |
|---|---|
| 1 | Refresh the profiles screen. |
| 2 | Create a new profile based on a specific template. |
| 3 | Save all the changes to the current profile, contains option to save all profiles at once. |
| 4 | Remove the currently selected profile. |
| 5 | Make an identical copy of the currently selected profile. |
| 6 | Discard the changes to the current profile, contains option to discard changes for all profiles at once. |
| 7 | Tests the connection of the profile on the interface. |
Using Context Fields
It is possible to use context related data in the profile fields. If you know that a certain field will be present in the context when a method is executed via this profile, you can use the data of that field by typing {$FieldName} anywhere in the profile field value.