Example
This chapter will explain the realtime data functionality by using an example.
Use Case - Introduction
At the moment, we have a page where we have an overview about all the employees working in our company. For the purpose of the example, the ADM is quite simple. We just show the Id and the Name of the Employee.
Our Employee object in the Business Connector looks like this:
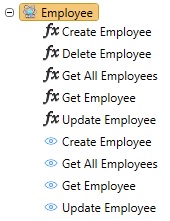
It's a very simple object with CRUD methods and some views.
Our webpage shows the 'Get All Employees'-view and looks like this:
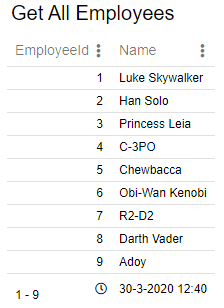
There is one problem though, when HR hires a new Employee, we have to manually refresh the page to see the new record. This problem also exists when HR fires an Employee and when an Employee gets updated. We do not want to implement javascript functionality to refresh the page every 5 minutes. We just want to see every change realtime.
Configuration in the Business Connector
The following steps need to be done in order to enable realtime data communication on our multi record view.
- Set the types on the methods from our object.
- Create a Realtime Key in the Master Data Section.
- Enable and link the Realtime Key to our unique object Field 'EmployeeId'.
- Make sure that our unique field 'EmployeeId' is used in our view and modify the notification properties.
- Refresh the webpage with the Multi Record View for the last time and test the modification methods.
Step 1: Method Types
We've introduced a new property on a method instance (as explained here: Object Configuration). So the first thing we need to do is give every method a type.
- Create Employee = Create
- Delete Employee = Delete
- Get All Employees = MultiRead
- Get Employee = SingleRead
- Update Employee = Update
Step 2: Master Data - Realtime Key
Now that we've set our method types, it's time to create our Realtime Key as explained here: Master Data Configuration. We will link this realtime key with the SingleRead method 'Get Employee' from our Employee object.
Step 3: Link the Realtime Key to the unique Object Field
In this step, we navigate to the object fields section of our Employee object. The field 'EmployeeId' is our unique object field and this is where we are going to enable and link the realtime key we've created in step 2.
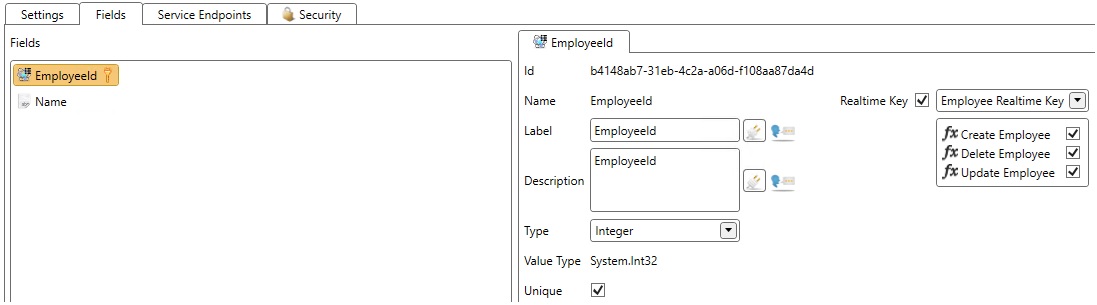
We enable realtime communication for our Update, Create and Delete methods as well.
Step 4: View configuration
In this step, we first check whether our unique object field 'EmployeeId' is used on our Multi Record View 'Get All Employees'. This is important. If the unique field is not configured as a view field, realtime communication will not be possible. However, it is allowed to configure it as a hidden field.
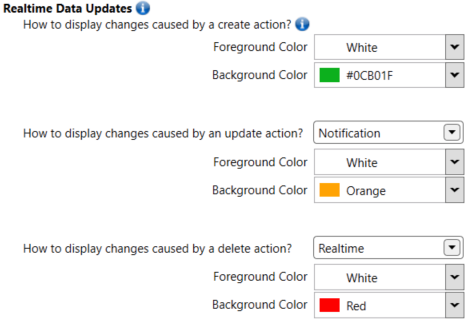
You can also change the colors of the notifications on the layout-tab of the view.
Step 5: Test the Multi Record View
Now all we need to do is refresh the webpage where the Multi Record View is visible on. If we run the 'Update Employee', 'Create Employee' and 'Delete Employee' methods in the Business Connector, we see these modifications automatically on our webpage without a forced refresh!
Dashboard
For a dashboard solution, it's best to use the refresh interval with realtime keys. This way the view will automatically refresh after the interval but only when there are changes. This will ensure that the data is always in the correct order but also reduce the number of calls since this will only happen when there are changes between intervals.
When the user interacts with the Multi Record View, the view will become dirty and the refresh interval will stop refreshing the view. Instead of a full refresh a notification will be shown telling the user that there is new data available from the server. If the grid is not dirty anymore, the refresh interval will continue to run as before and refresh when necessary.