Tutorial: Dynamic Case Management
With the Ometa Framework's Dynamic Case Management (DCS) solution, creating digital workspaces to initiate and manage collaborative processes is quick and easy. This solution enables centralized access and management of information from various systems (ERP, CRM, etc.), making it easy to stay organized. SharePoint is often utilized to facilitate document storage.
Our hands-on tutorial offers a simple example to help users configure a lifecycle and set up Dynamic Case Management efficiently. For this example, we'll be working with employees and their digital workspaces. Each employee will have a unique digital workspace for managing their administration, such as reporting hours and accessing HR documents.
To get started, we'll need to define a lifecycle in DCS. In this case, the process that each employee follows will be the lifecycle. Each employee will have their own case provisioned. The 'D' in DCS represents the dynamic nature of this solution - the workspace can change depending on the state of the employee case. In our example, there are two states: active or archived. When an employee is active, they have full access to the digital workspace. When an employee is archived, a read-only environment is created for historical purposes.
Employee Sync
To sync the employees from the AD to our Ometa Framework database, we use a sync job that runs every x hours. This sync job will then get all the employees from the AD and insert/update/delete them in the Ometa Framework database.
To execute this sync job we first need an object that can get the employees from both the AD and our Ometa Framework database as well as updating the employees in our Ometa Framework database.
Views
First of all, there are 2 views/methods which are needed, one to get all the employees from our Ometa Framework database and one to get the employees form the AD.
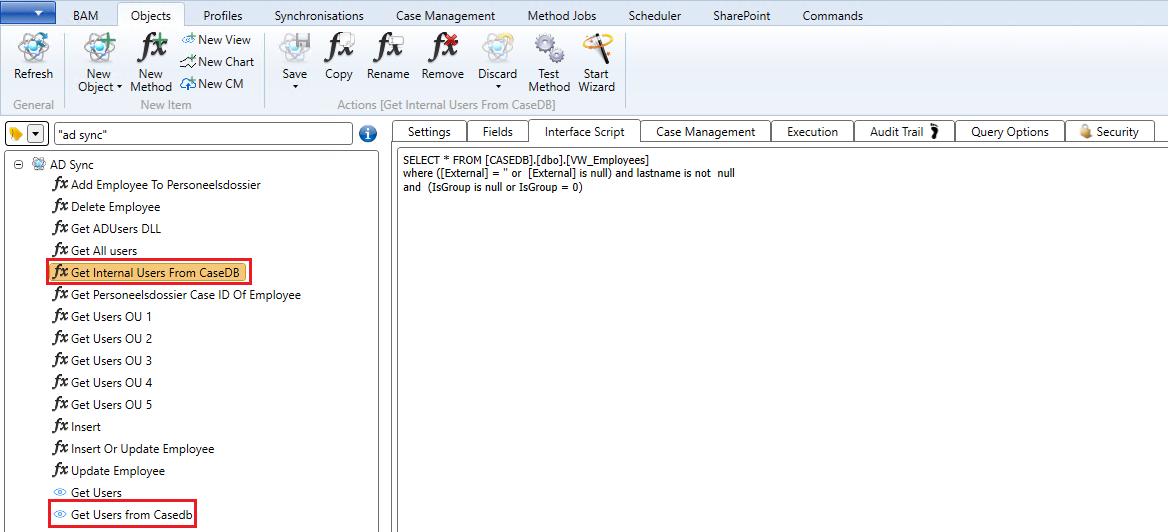
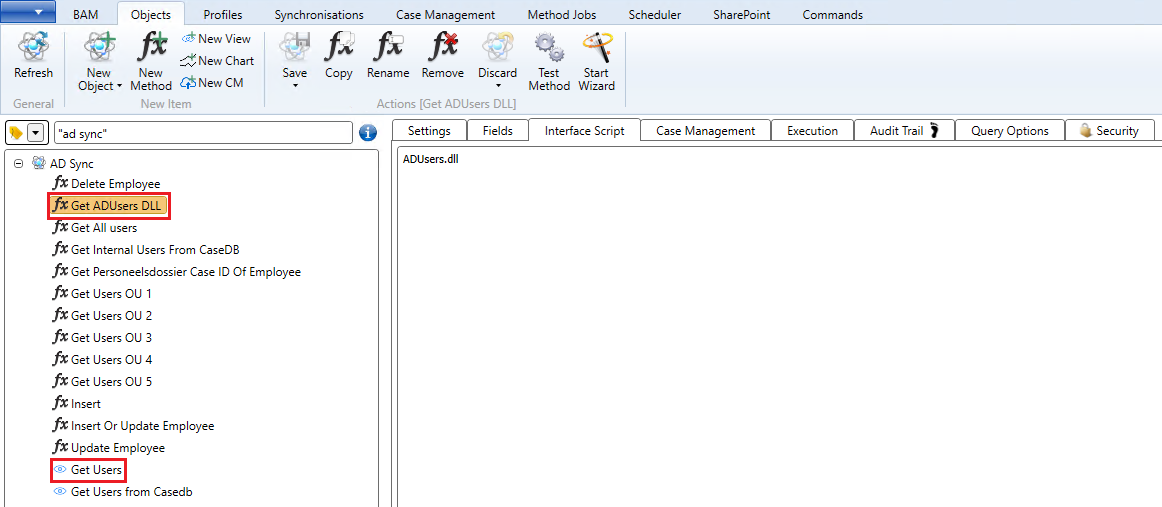
In this case, the method that will get all the employees from the AD is a DLL which will execute multiple calls. This can also be done by using data extensions.
CRUD
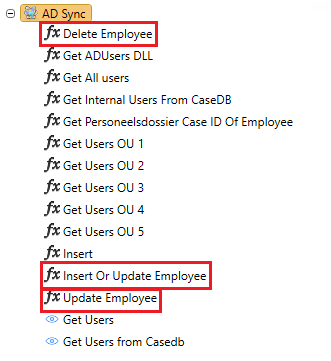
The other methods in this object are used to Create/Update/Delete employees in our Ometa Framework database.
Synchronisation
When the object has been validated, a synchronisation needs to be added that will use this object.
The schedule for this synchronisation is adjustable to the users preference (mostly 1 or 24 hours).
First of all, the View Settings, source is the view that will get the AD users while destination is the link to our Ometa Framework database.
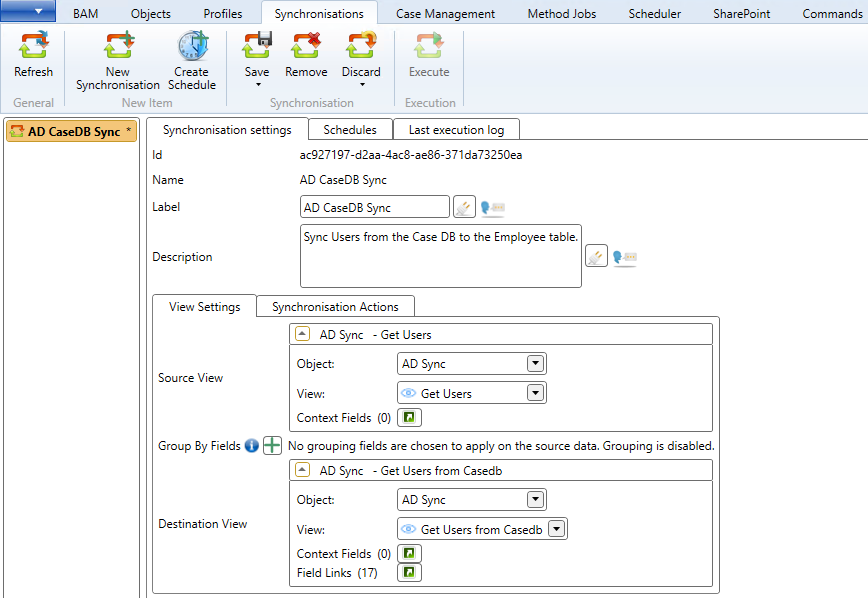
The Synchronisation Actions which need to be set to the CRUD methods mentioned earlier.
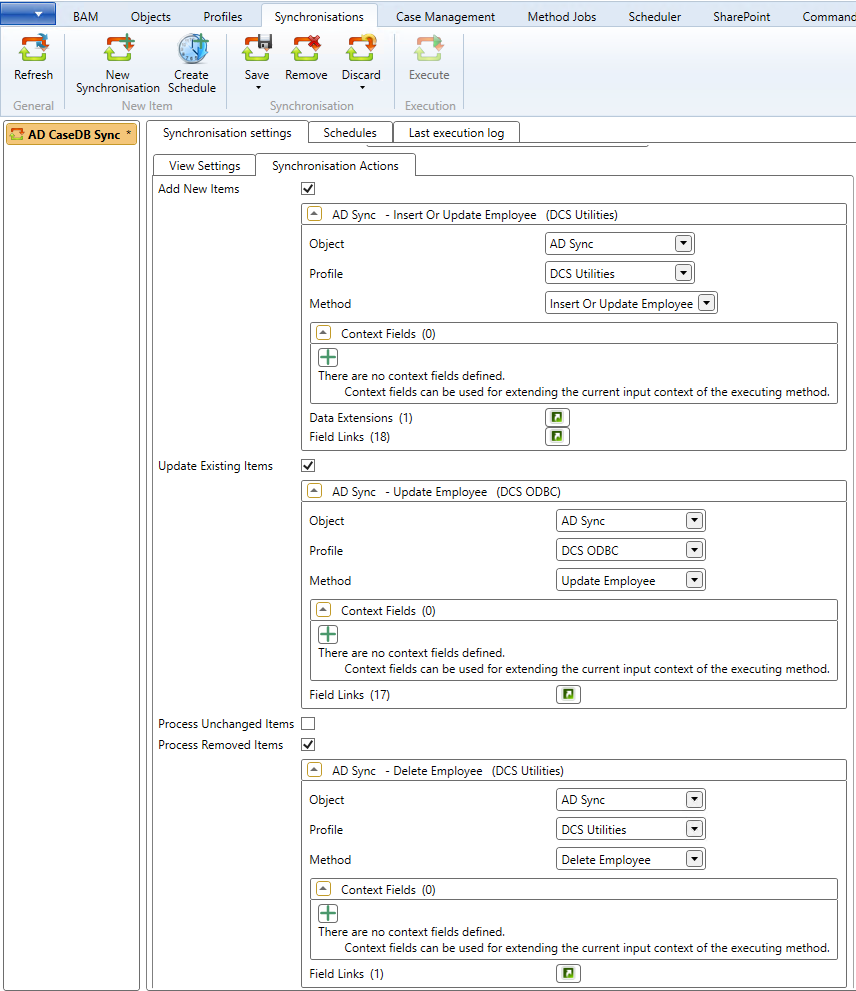
The last part that needs to be set is the schedule for this synchronisation, as said before this can be chosen by the user, but most of the time this is 1 or 24 hours.

Concept
The main idea behind the configuration is to create a site collection in SharePoint that will serve as a dashboard and provide views for supporting all detail views for the case. This approach differs from the more traditional way of setting up individual SharePoint site collections for each case, which can be slow on SharePoint Online. The reason for this is that creating a site collection for every case requires SharePoint to create the site collection and provision the site with building blocks, which can be time-consuming.
By using a single site collection for all cases, you can avoid the performance issues that come with creating a site collection for every case. However, this approach requires two separate lifecycles: one for provisioning the dashboard and one for creating the employee cases. The dashboard lifecycle involves creating the site collection and configuring the dashboard and views, while the employee case lifecycle involves creating individual cases which stores the required meta data of that employee.
Employee Dashboard Lifecycle
The employee dashboard lifecycle is a straightforward process for provisioning the dashboard. The dashboard provides the following functionality:
- A list of all employees in the organization, including their contact information and role.
- Navigation to the employee pages, where users can view detailed information about specific cases.
Employee case pages provide a detailed view of each case, including case history, related documents, and any updates or notes. By providing easy navigation to these pages, the dashboard makes it simple for users to find and manage the cases they are responsible for.
Employee Dashboard Object
To create a lifecycle in DCS, you need to first create an object that will contain all the necessary metadata. This object will also include a method for creating the employee dashboard and its corresponding SharePoint site collection. The metadata for this object will only be the Name of the dashboard site.
You typically use a method called Ensure Employee Dashboard. This method includes a "Employee Dashboard Name" field, which serves as the primary key for the object. The interface script will include a line of SQL code to create this method:
SELECT 'Employee Dashboard' AS [Employee Dashboard Name]

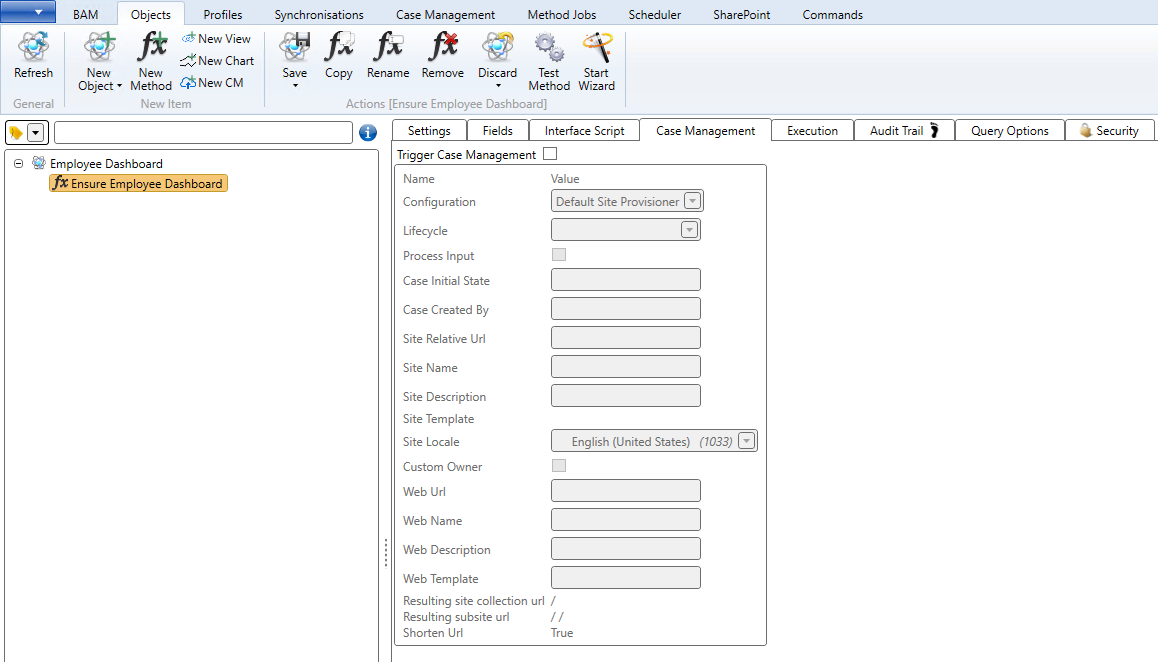
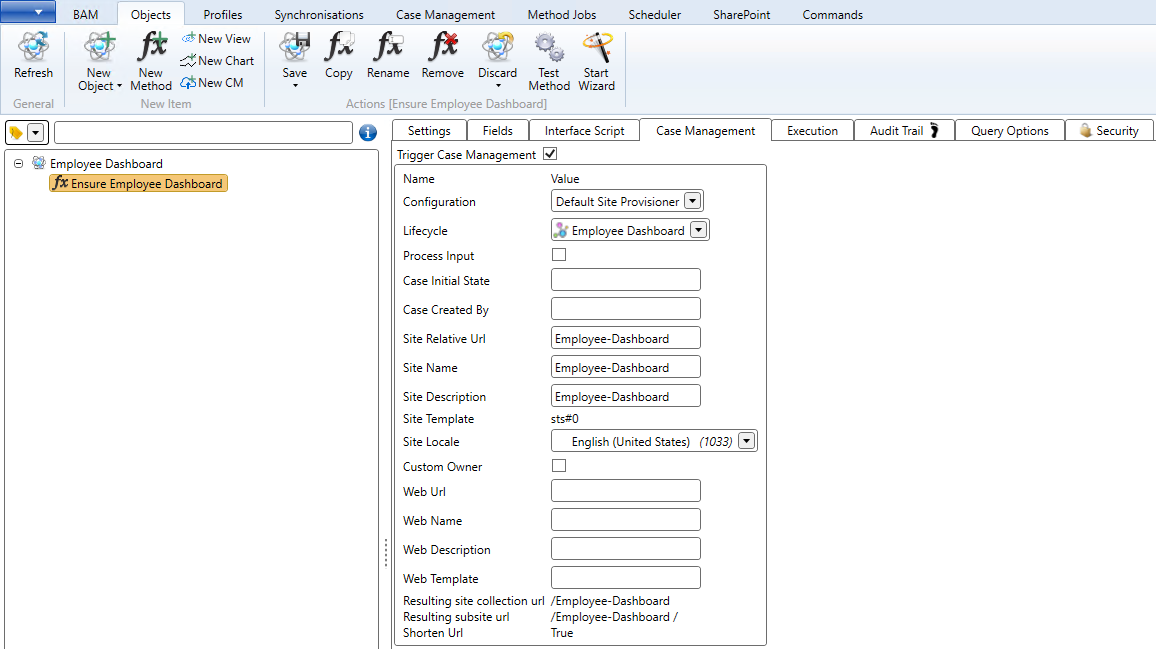
The trigger to Case Management (refer to the Case Management tab of the method) will be enabled after the lifecycle is created.
Lifecycle Configuration
The dashboard lifecycle is a process for creating the site and pages needed to support employee cases. This lifecycle is designed to be simple, with only one case: the dashboard site. By using a lifecycle, it is easier to support the deployment process across different environments.
In this context, the term "deployment process" refers to the steps involved in moving the dashboard site and its associated pages from a development environment to a production environment. By using a lifecycle, the deployment process can be standardized and streamlined, making it easier to ensure that the dashboard site is consistent across different environments.
Using a lifecycle for the dashboard site also has other advantages. For example, it makes it easier to manage and maintain the site over time, as well as to make updates and modifications as needed. Overall, the dashboard lifecycle is an important component of the DCS system, providing a simple and effective way to manage employee cases and support the needs of the organization.
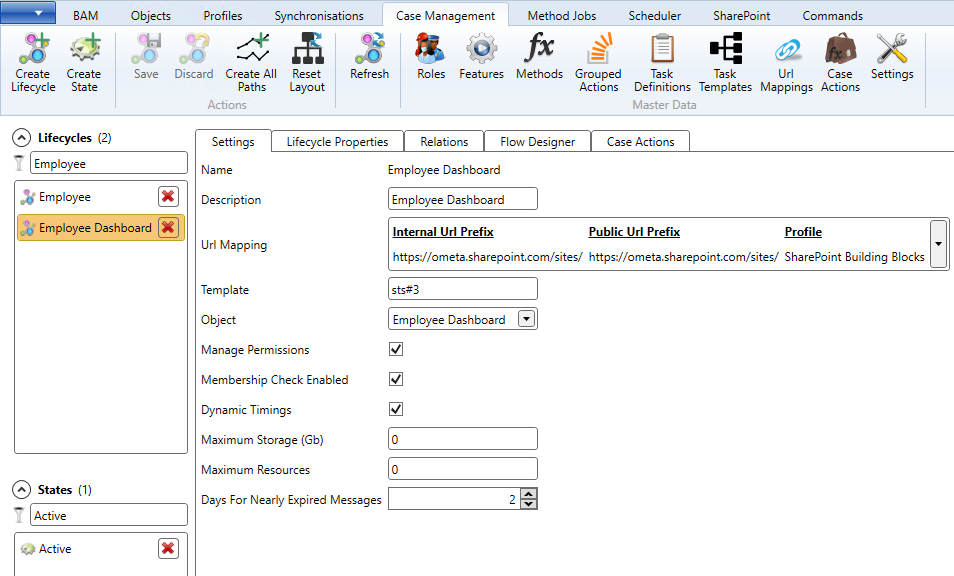
| Setting | Value |
|---|---|
| URL Mapping | This determines the location where the SharePoint site should be created. |
| Template | The template for the dashboard site. We recommend using the STS#3 template, which is a Modern Team site, this enables the Modern Experience. |
| Object | A reference to the Employee Dashboard object. |
| Manage Permissions | This setting should be checked if you want to automatically create SharePoint groups based on the configuration. This can be useful if you need to manage permissions for different groups of users. |
| Membership Check Enabled | This setting should be checked if you want to grant access to the dashboard site only to users who are members of the lifecycle. By checking this setting, you can ensure that only authorized users are able to view and interact with the dashboard site. |
Lifecycle properties
While the dashboard site will only have one case, it still needs a primary key. This will be the Name field.
Flow Designer
The "initial actions configuration" is a key part of provisioning the dashboard site collection in SharePoint. This configuration includes a number of building blocks that are used to create all the necessary pages and functionality for the "Employee Solution".
During the initial configuration, you will create pages to facilitate employee cases, as well as provide an overview of all employees. These pages will be used to give users insights into specific employees within the organization.
To create these pages and add the necessary functionality, you will use a variety of building blocks. These building blocks are actions that are performed in SharePoint to provision the site collection and create the necessary pages and functionality.
Overall, the "initial actions configuration" is a critical part of setting up the dashboard site collection for the "Employee Solution". By using the right building blocks and following the correct procedures, you can create a site collection that is efficient, user-friendly, and meets the specific needs of your organization.
Every lifecycle needs to have one state, so you can use the created state for this.
An example of this can be found here: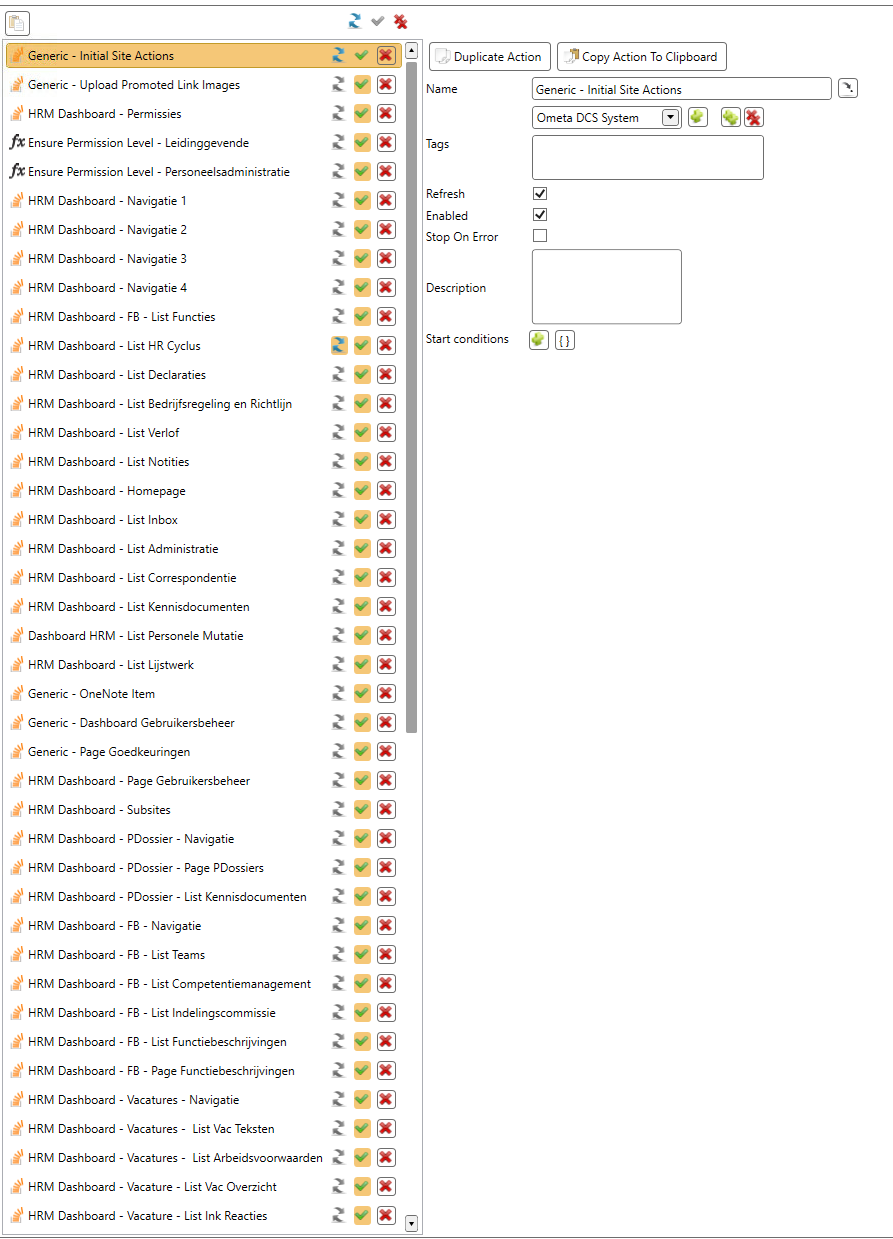
Trigger Case Management
After fully configuring the employee dashboard lifecycle, you can link it to the "Ensure Employee Dashboard" method. When you execute this method, it will create a case based on the lifecycle and execute all the necessary building blocks from the initial actions configuration.
It's important to note that this process can take a few minutes, as you need to wait for the SharePoint site collection to be created and for all the building blocks to be executed sequentially. However, once the process is complete, you will have a fully functional employee dashboard site collection that can be used to manage cases and track employee information.
Employee Lifecycle
Employee Object
The employee object will contain all the necessary methods to access employee information, such as personal information, hour registration, HR documents, certifications, skill sets, and much more. It's important to include the primary key of the employee in the object, which will be used to bind to the respective employee case later.
Lifecycle Configuration
In this tutorial, we will create another lifecycle called "Employee" to support the flow of the employee cases. Unlike the dashboard lifecycle, the Employee lifecycle will not create any SharePoint site collections. Instead, it will be used to manage the lifecycle of each employee case. In our example, an employee can be either active or archived, meaning they no longer work in the organization. For each employee in our organization, we will create a case that follows the path of the lifecycle. Each employee case is an instance of the Employee lifecycle, and there may be multiple employee cases associated with a single lifecycle.
The settings of the employee lifecycle will be the following:
| Setting | Value |
|---|---|
| URL Mapping | This determines the location where the SharePoint site should be created. |
| Template | Provide a dummy value, which will be ignored because in this example, you will not create separate SharePoint sites for the employee cases. This value is required to save the lifecycle configuration. |
| Object | A reference to the Employee object. |
| Manage Permissions | This setting should be checked if you want to automatically create SharePoint groups based on the configuration. In this example, groups are managed on the dashboard itself and not the individual employees. |
| Membership Check Enabled | This setting should be checked if you want to grant access to the employee case only to users who are members of the lifecycle. By checking this setting, you can ensure that only authorized users are able to view and interact with the employee case. |
Lifecycle properties
The lifecycle properties are the metadata values stored in the employee case. The most critical metadata is the employee key, which is required to retrieve the latest and most up-to-date information about the employee from external information systems like CRM. Additional properties can be added as needed, including custom values that are not available in the external system but may be relevant for display to end users. So you can see that as additional storage of metadata.
The lifecycle properties for the employee case will just be the employee id.
Trigger Case Management
After fully configuring the employee lifecycle, you can link it to the "Create Employee" method. When you execute this method, it will create a case based on the lifecycle. Optionally it will execute all building blocks if they are configured on the initial actions or states.