Editing values using an edit button
Editing values using an edit button allows the user to edit a record without accidentally editing other records.
In this article we will guide you through the configuration of inline editing with an edit button and show you what the effect will be for the user.
Configuration
- Select the Get All view of the Orderline object.
- Open the Views tab.
- Below the dropdown list where you chose the Update view, set Inline Editing to RecordButtons.

- Save the changes.
Tip
It could be possible that you receive a save notification at this point. If this situation occurs, please refer to Specifying the inline editing data set.
Working with Batch Editing
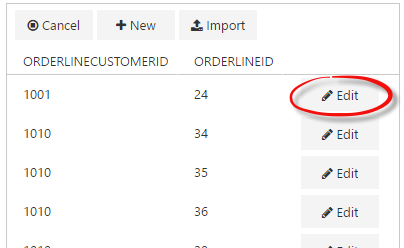
The first thing that you will notice is that a button has been added to the header of the ADM:

Clicking this button will change the layout of the ADM. Some functionality will not be available in inline editing to prevent unexpected behavior. The ADM now shows all the visible fields of the Update view, with the data from the attached Multi Record View For Inline Editing. It could be possible that you see more or less columns than before.
At the end of every record is an edit button.

Header buttons
The header of the ADM can have three buttons at this point. This depends on the configuration of the MultiRecord view.

Cancel
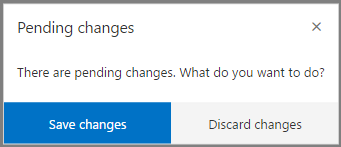
The Cancel button is always shown. Clicking this button will close inline editing and return to the previous state of the ADM. If you have pending changes, a pop up dialog will be shown asking what you want to with those changes.

New
The New button is only visible if creation is enabled on the MultiRecord view. Clicking this button will add a new empty record at the top of the ADM.
Import
The Import button is only visible if creation is enabled on the MultiRecord view. Clicking this button will open the import pop up.
Changing Values
Values can be edited by clicking the edit button at the end of a record. This will render the controls for every editable field in the record. At the end of the record, the edit button has been replaced with a save button and a cancel button.

Save button
This button will try to save the changes that have been made to the record. If it's not possible to save the changes due to some error, the record will receive a red background. Hovering the record will show a tooltip with the appropriate error message.
Cancel button
The cancel button with discard the changes that have been made to the record and return to the display state of the record.
Tip
Clicking the edit button of a different record will render the controls for the new record and set the previous record back to displaying its values. If any pending changes were not saved in the meantime, a pop up will be shown asking what you want to do with the changes.