Importing Framework Items
Importing an export archive is done via the Import Wizard. This guide provides an overview on how to use this wizard to import the contents of an export archive. See the Export Wizard article for a guide on how to create an export archive.
Important
The import wizard will import framework content on the framework installation the wizard is executed in.
Starting the Import Wizard
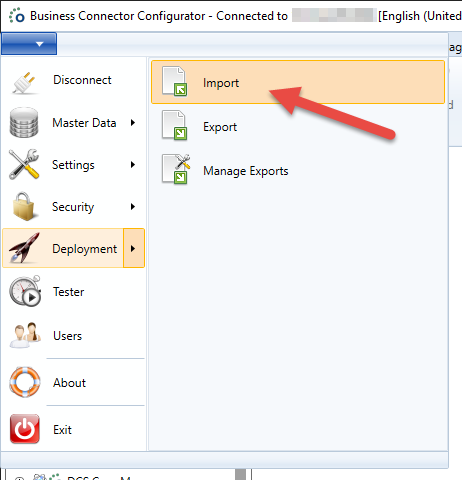
Starting the wizard is very simple, it can be started directly from the application menu:
- Open the Application Menu.
- Go to the Deployment item.
- And click on Import.
Export Archive Selection
The import wizard uses the data of a export archive to import the framework content. In the first step of the wizard, you must select the export archive to load the data to import and continue. This is the .zip file you retrieved at the end of the Export Wizard.
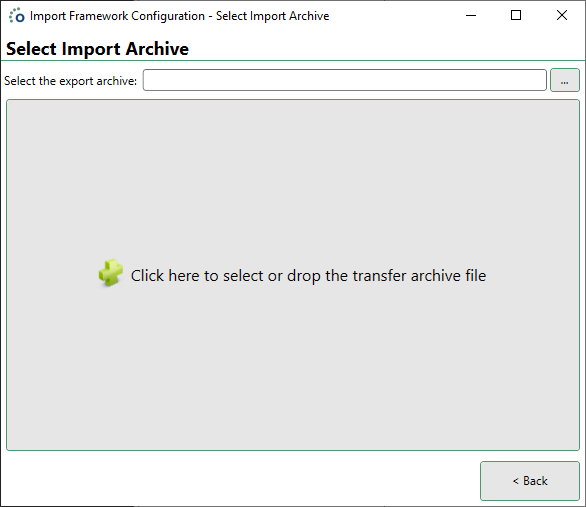
Selecting the file can be done by either dragging the .zip archive onto the center of the page, or by clicking in the center of the page and selecting it through the file explorer.
Item Selection Pages
After the export archive is loaded, the next selection page will show. Pages for a type of framework content will only be shown if that any content of that type was exported in the first place.
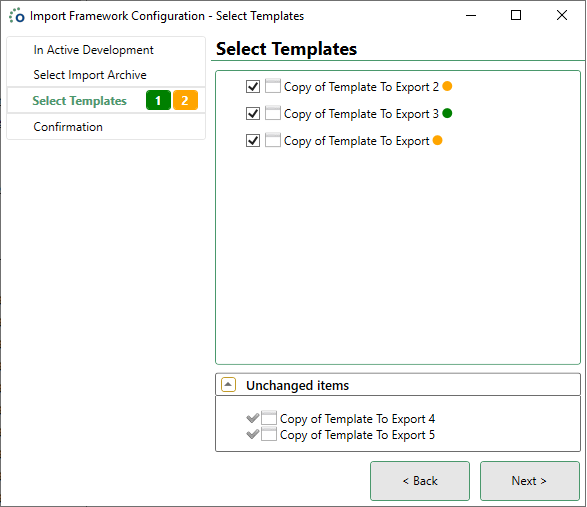
The page shows the content that was exported. At the top of the page it shows the items that are available to import, the icons indicate the state for each item compared to the current framework installation.
| Icon | State |
|---|---|
| Green | The item is not present in the current framework installation. |
| Orange | The item is present in the current framework installation, and was changed compared to the exported item. |
The items at the bottom of the screen in the Unchanged items section are items that are already present on the current framework installation and are unchanged compared to what is being imported. Importing these items would be redundant.
The numbers in the navigation menu indicate how many items were selected for import for each type of content.
When your selection is made, click next to proceed with the wizard. This page can later be revisited by clicking on it in the navigation, or by going back using the buttons.
Object Selection Page
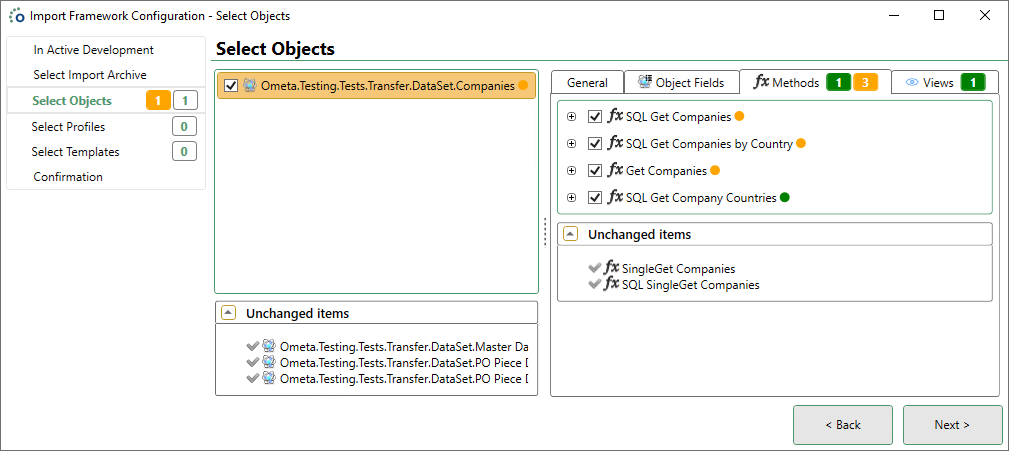
The selection page for objects differs from the other pages. Objects that are completely unchanged remain in the bottom Unchanged Items section. However, selecting an object allows for including or excluding certain methods, views, context managers or charts from the object.
Warning
The import wizard marks methods, views, context managers and charts not present in the export for deletion by default. Unchecked methods, views, context managers and charts from the export will not cause them to be deleted.
The aim of these deletions is to keep the resulting object as close as possible to the object present on the original export object, however these can be ignored by clicking the undo button next to the individual items.
Tip
When doing quick fixes of methods (or other content) on a production environment, it is recommended to mimic these changes on the development environment as the transfer tool will mark these additional methods as removed by default when importing.
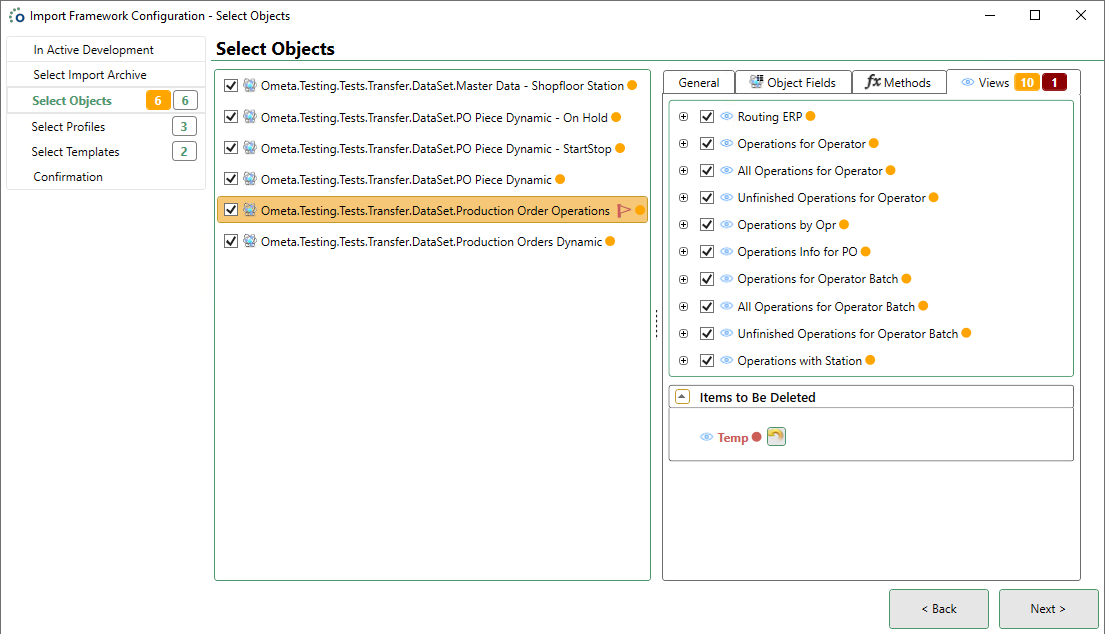
In the example above the view 'Temp' will be deleted from the object when finishing the import wizard. Objects that have items that would be deleted on import are indicated with the flag 🚩 behind the object name.
Import Confirmation
The last page of the Import Wizard provides an overview of all selected items and their dependencies to be imported. This way a user can make a final check before the content will be imported on the current framework installation.
Each category has a summary with the number of items imported (3), the number of new items (1) and the number of changed items (2).
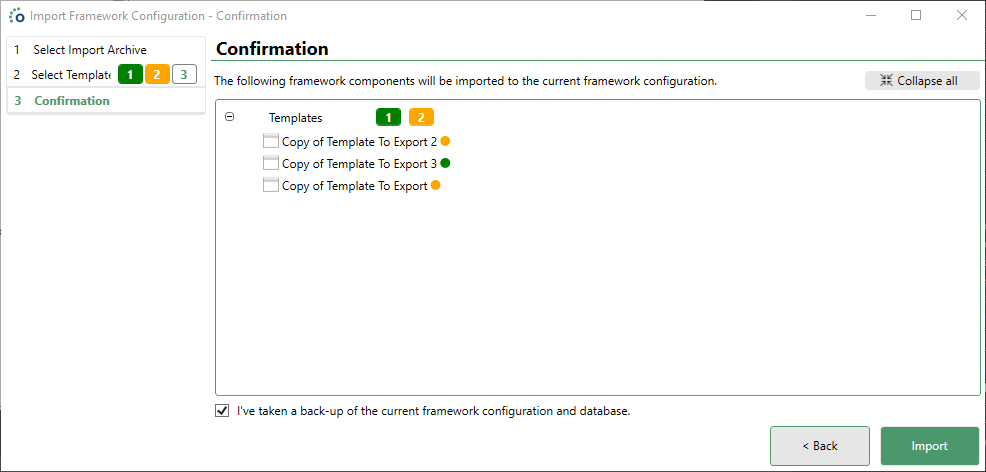
When everything is fine, confirm that you've taken a backup and click the Finish button to import the selections into the current framework installation.
Import Validation
Before the transfer tool starts importing the content, it will validate the data present on the framework to ensure that the new configuration will be valid. This is mostly aimed at the import of objects to ensure that all objects and their uses (e.g. synchronisations) remain valid. An example of this can be that the template change on a method would result in an invalid profile for a method job.
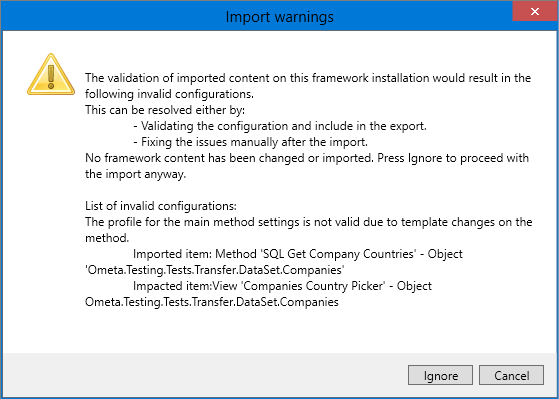
In order to fix these warnings, one of the following actions can be taken:
- Include the configuration that would be invalid to be imported as well.
- Exclude the item that caused the warning.
- Ignore the warning and continue. This is not advised as the import is likely to fail due to invalid object configurations.
Note
See the Import Validations section in the dependency management article for a comprehensive list of all validations.
Depending on the size of your solution and the number of items imported, the validation procedure may take some time initially. The warning window can be closed to include additional content into the import that would resolve the issues detected.
Import Completed
After the import is completed, a final dialog box is displayed that shows the result of the import. Before the content was imported, a copy of the content that was about to be replaced was saved in the Ometa Framework database for fallback purposes.
Note
This backup can be found under the Manage Previous Exports window in the application menu. It will be named 'Framework Before Import current date and time' and will be hidden from export comparisons by default.
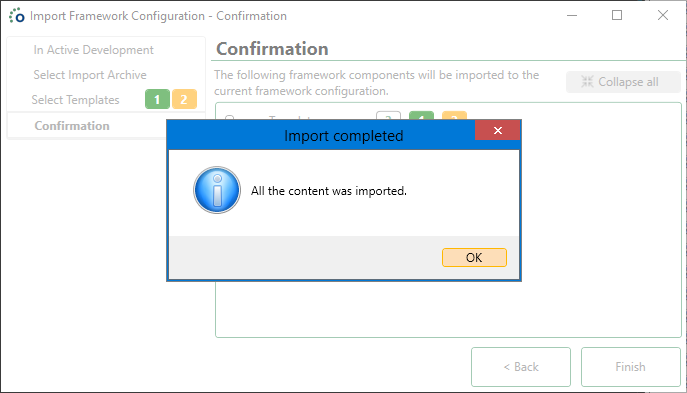
Click OK to close the dialog and the Import Wizard, to complete the import process.