Start Ometa Business Connector
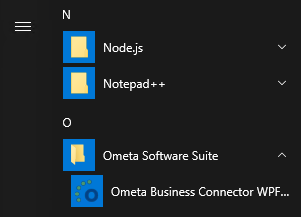
Start the Ometa Business Connector available via Windows Start in the folder Ometa Software Suite.
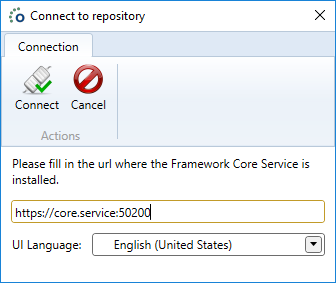
Enter the URL of the Ometa Core Service. The first AD user to login into the Ometa Business Connector will be the administrator.
Important
A user can only be an administrator if it has a valid email claim. If the user you are using to login for the first time is coming from the local AD, you must make sure that this user has a valid email address in AD. You won't be able to configure security options without it.
Warning
If you use your local AD to login in the Ometa Business Connector and constantly get a popup to enter your credentials, chances are you encountered a security measure of IIS better known as the Loopback Check. Read the troubleshooting section for more info.
Troubleshooting
The Website Cannot Display The Page
When trying to log in into the Ometa Business Connector and you get a pop-up displaying the error: "The website cannot display the page".
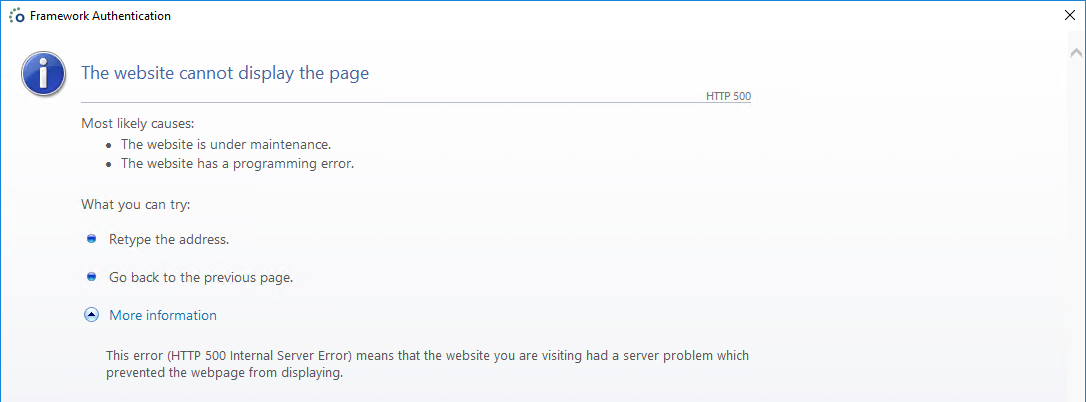
Possible fixes for this issue:
- Verify that Windows Authentication is enabled on the Ometa Authority Service in IIS. Refer to Windows Provider (AD) for more information
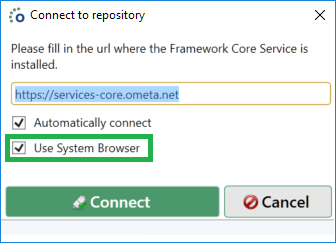
- Try using the system browser instead of the builtin embedded browser.
Error Loading Discovery Document
When trying to log in into the Ometa Business Connector and you get a pop-up displaying the error: "Could not connect: Error loading discovery document: Error connecting to URL/.well-known/openid-configuration: Not Found". This means that you probably have entered the wrong configuration in the Config table of the Ometa Framework database. Refer to the core service article..
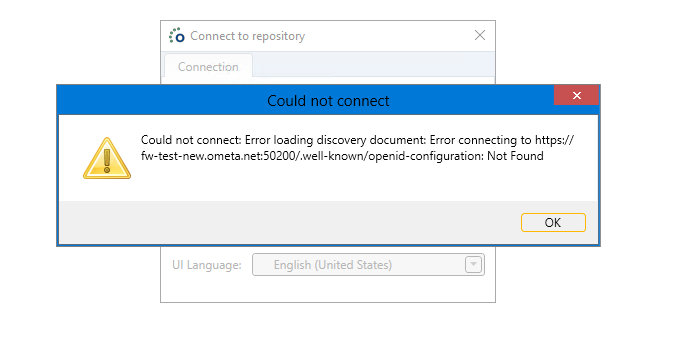
Internal Server Error
It might be possible that you encounter an Internal Server Error message when trying to connect to a repository using the Ometa Business Connector.
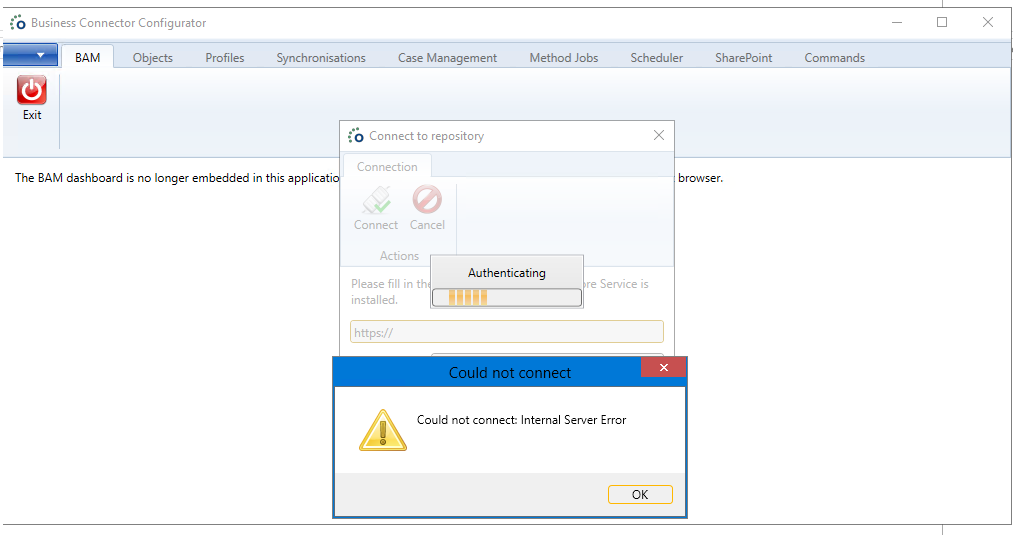
If you get this message, check if the Authority Service IIS site is configured correctly and inspect the logging of this service if needed. By default this logging is located at %OMETA_INSTALL_ROOT%\Log.
Keyset does not exist
If you get the error Keyset does not exist in the logging of the Authority Service, this is probably because the application pool user does not have permissions to read the private key. Validate the following settings:
- Open MMC (Microsoft Management Console).
- Add the Certificates Snap-in.
- Select Computer Account and click Next.
- Select Local Computer and click Finish.
- Navigate to the certificate, right click, select All Tasks and Manage Private Keys.
- Make sure the user of the application pool has permissions.
IDX10630: The '[PII is hidden]' for signing cannot be smaller than '[PII is hidden]' bits. KeySize: '[PII is hidden]'. Parameter name: key.KeySize
If you get the error IDX10630: The '[PII is hidden]' for signing cannot be smaller than '[PII is hidden]' bits. KeySize: '[PII is hidden]'. Parameter name: key.KeySize in the logging of the Authority Service, this is probably because the signing of the SSL certificate is too weak. Digital Certificates must be signed with at least a 2048 key. The 1024 bit keys are deprecated since 31st December 2013.
SSL Handshake Error Occurred
When the Business Connector displays a dialog starting with the message: "Could not connect. An SSL handshake error occurred: ...", there is a potential issue with the SSL configuration. As long as the SSL configuration is active, logging on to the Ometa Business Connector is impossible.
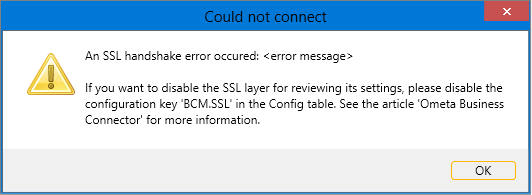
Take the following steps to disable the SSL configuration:
Connect with Microsoft SQL Server Management Studio (or similar tool) to the Ometa Framework database.
Look up the configuration key "BCM.SSL".
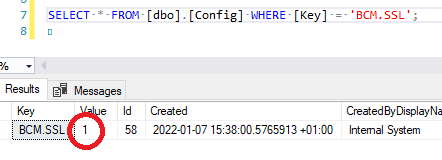
Change the value from 1 to 0.
Restart the Ometa Business Connector.
If logging on doesn't work immediately, it could be necessary to restart the BCM service as well.
After logging on, it will be possible again to modify the framework SSL settings from within the Business Connector and correct the issue.
Loopback Check
If you try to authenticate with your local AD to the Authority Service, it can happen that it keeps asking you to fill-in your credentials. This is caused by a security measure introduced in IIS where you are unable to authenticate when navigating to a secured resource on the same server as the resource itself via a fully qualified domain name. This security measure is often referred to as the Loopback Check and can be very annoying if you are using the WpfGUI from the same server as the Ometa Framework itself.
You have 2 options to workaround this issue.
Define the hostnames that can be used (recommended)
- Open up the registry editor
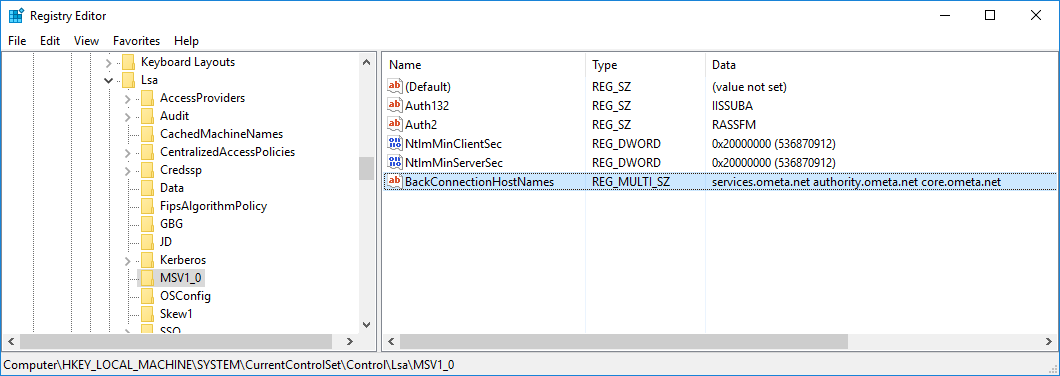
- Navigate to HKEY_LOCAL_MACHINE\SYSTEM\CurrentControlSet\Control\Lsa\MSV1_0
- Check if there is already a registry value named BackConnectionHostNames
- If not, create it by right-clicking on the MSV1_0 key and adding a new Multi-String Value value named BackConnectionHostNames
- If it exists, but its type is not a Multi-String Value, recreate it with the correct type
- Set the value of the BackConnectionHostNames to contain all the hostnames which you want to use from the server itself
- Each hostname must be on a new line
- Restart IIS and the WpfGUI/Browser and retry your authentication
- Sometimes it can be necessary to completely reboot the server
Completely disable loopback check
- Open up the registry editor
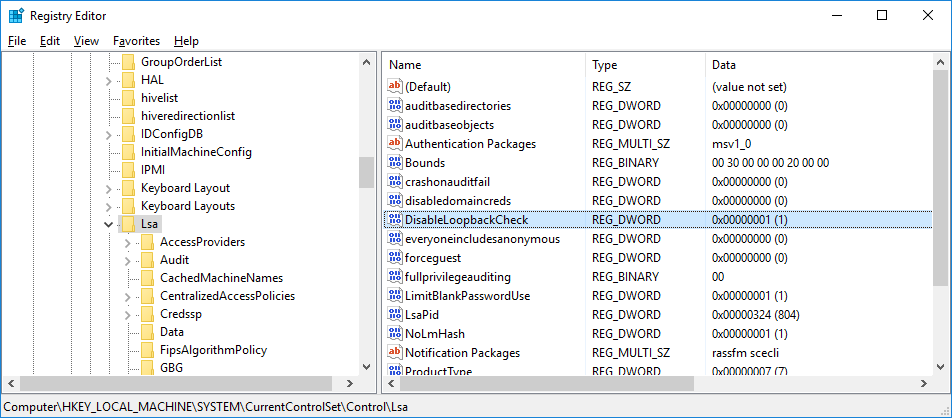
- Navigate to HKEY_LOCAL_MACHINE\SYSTEM\CurrentControlSet\Control\Lsa
- Check if there is already a registry value named DisableLoopbackCheck
- If not, create it by right-clicking on the Lsa key and adding a new DWORD value named DisableLoopbackCheck
- Set the value of the DisableLoopbackCheck key to 1
- Restart IIS and the WpfGUI/Browser and retry your authentication
- Sometimes it can be necessary to completely reboot the server
Blank Authentication Pop-up in the Business Connector
Refer to the troubleshooting of Authority Service White Screen.